


01 Sep WR250R Steering Bearings! Part 1

Heed the Warning
Yeah… I knew it and never did anything about it.
What you ask?! After I read several reports from fellow WRR owners that Yamaha skimped on greasing the steering bearings from the factory, I still never did anything about it. And because of that, my steering bearings and upper/lower races are shot! On my last 3 day ride of about 600 miles, I noticed on day 3 the front end reacting very strangely. My first thoughts were that I had a flat tire.. then I thought my front suspension was blown out.. yep that had to be it.
When I returned home I called my good buddy Mark “BigDog” Sampson and talked with him about what I noticed. I told him the front suspension is just broke. He told me there’s no way.. it must be something else. So he told me to go check my steering.. does it feel notchy or sticky at all while moving the bars from left to right. I headed to the garage where my WR was already on my stand, and sure enough.. my steering felt very notchy, especially coming off center both left and right. Almost as if it had a locked-in position dead center. He said.. “your steering bearings are shot.. have you greased them since you bought it?” “Um.. no.” I replied. And I knew better, heard plenty of stories of needing to repack them, saw photos of dry bearings and all.. I’ll at least say it was on my “ToDo” list!!
So, for all you out there who haven’t repacked your steering bearings yet.. I’d advice getting out there and doing it. The job isn’t that tough.. at least not as tough as replacing all of it like I’m now faced with!
Time to Disassemble
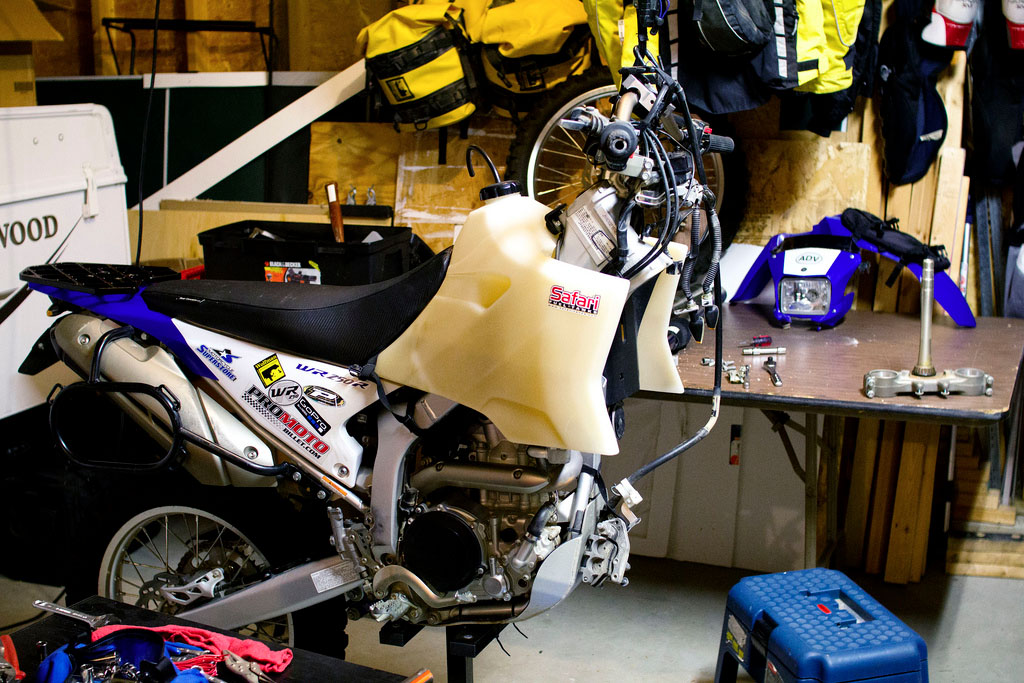
I put my WR on the stand and begun disassembling the front end. Don’t be shy here.. just start taking it all of, cuz its all gotta come off! Remember to put bolts back in their treaded counterpart if you can, this way they don’t get lost. Here’s what I removed:
- Front wheel
- Front disc assembly, remove it from the left fork (I tied mine up to the frame near my bash guard)
- Front forks, slide both forks out of the triple tree fork clamps
- Front fender
- Headlight assembly
- Turn signals
- Handguards, if the mount to the triple tree like my Cycra’s do.
- Handlebars/Top clamp (tied them up from the ceiling)
I used a strap to hold the bars, clamp & electrical up out of the way.
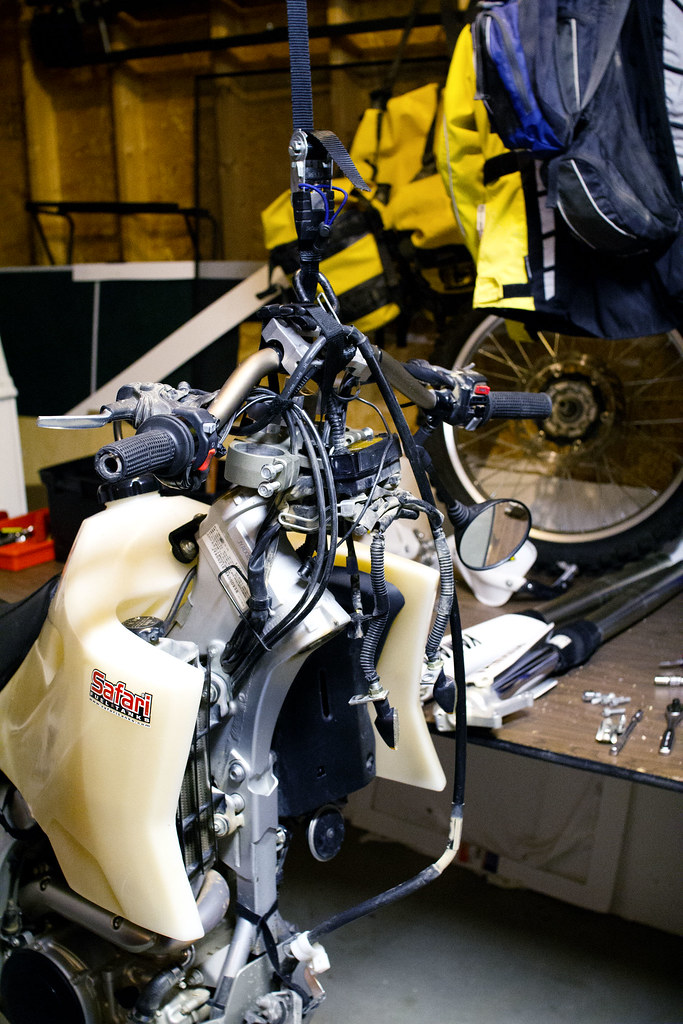
Now I was ready to loosen the top locknut. Using a 27mm socket it loosened up pretty easily. Pull the top fork clamp off, pull the lock washer off, then using a flat head screw driver tap the next two locknuts off. Here’s a diagram of the whole assembly:

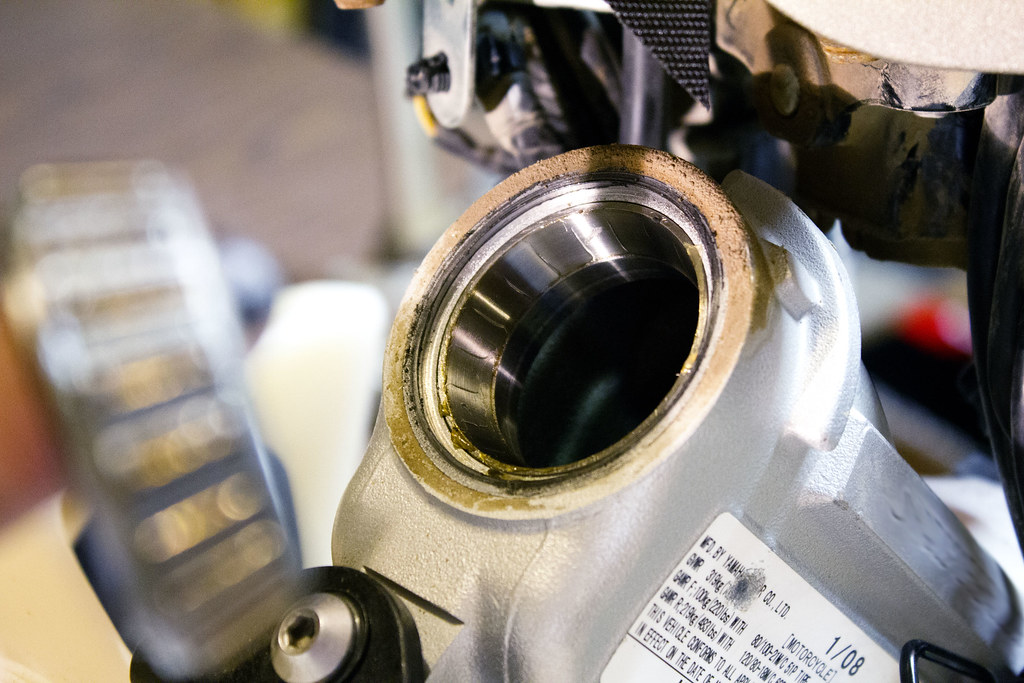
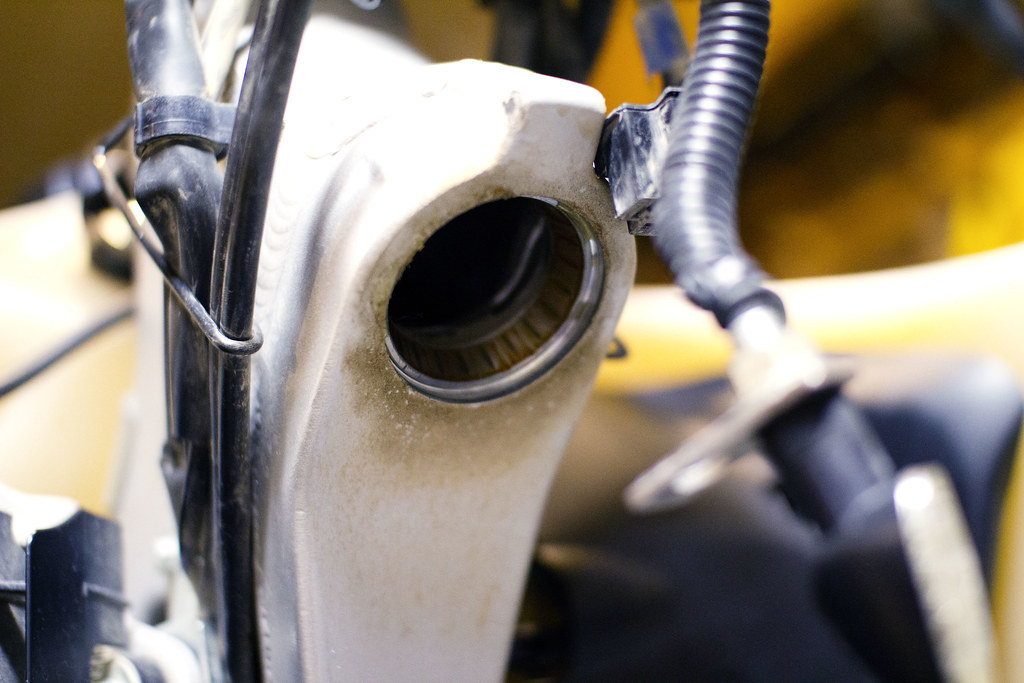
Now that I can see the top bearing I immediately noticed it was in bad shape… a lot of Mississippi dust has collected around it.

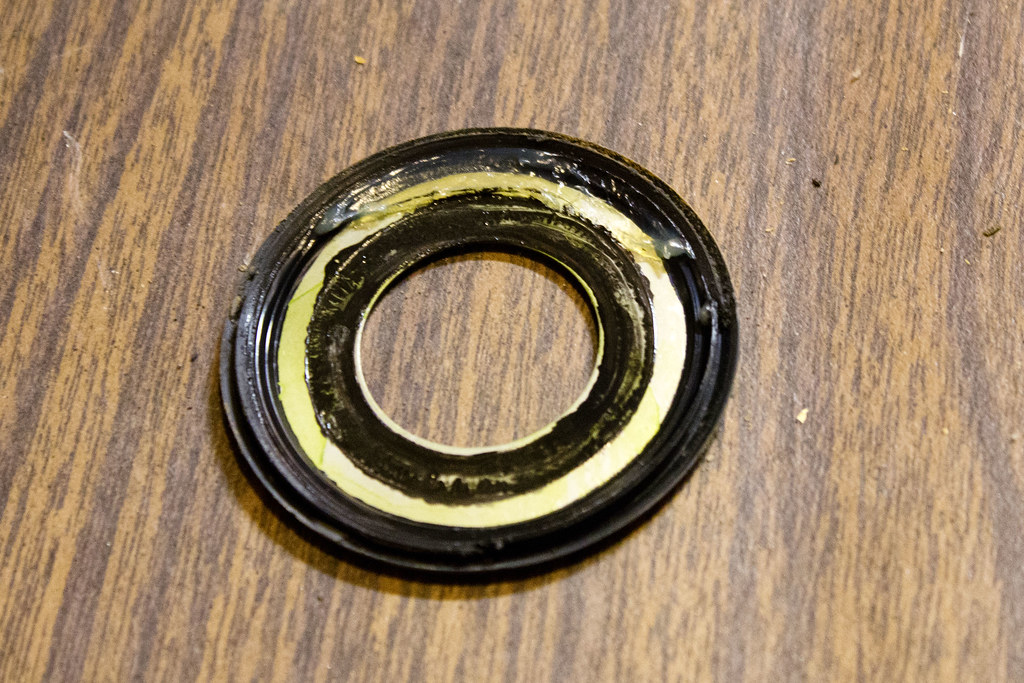
Removing the dust cover, I can see the bearings pretty much have no grease on them..
That dust cover is shot for sure!
I pulled the top bearing out for a closer look.. not in the best of shape is it.. that thing should have waterproof grease all over it!
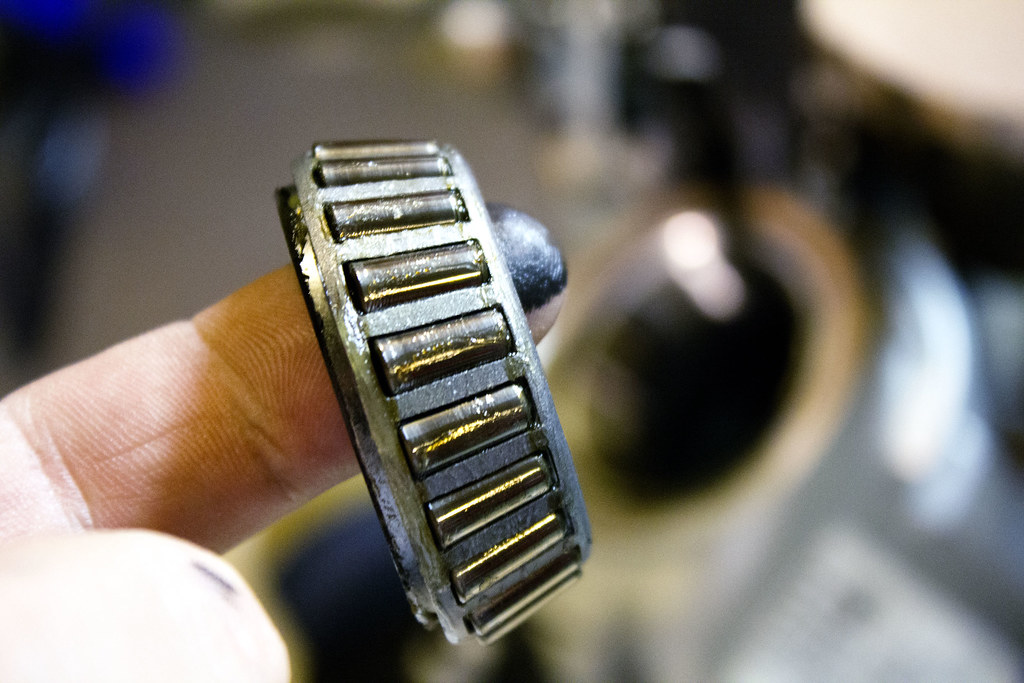
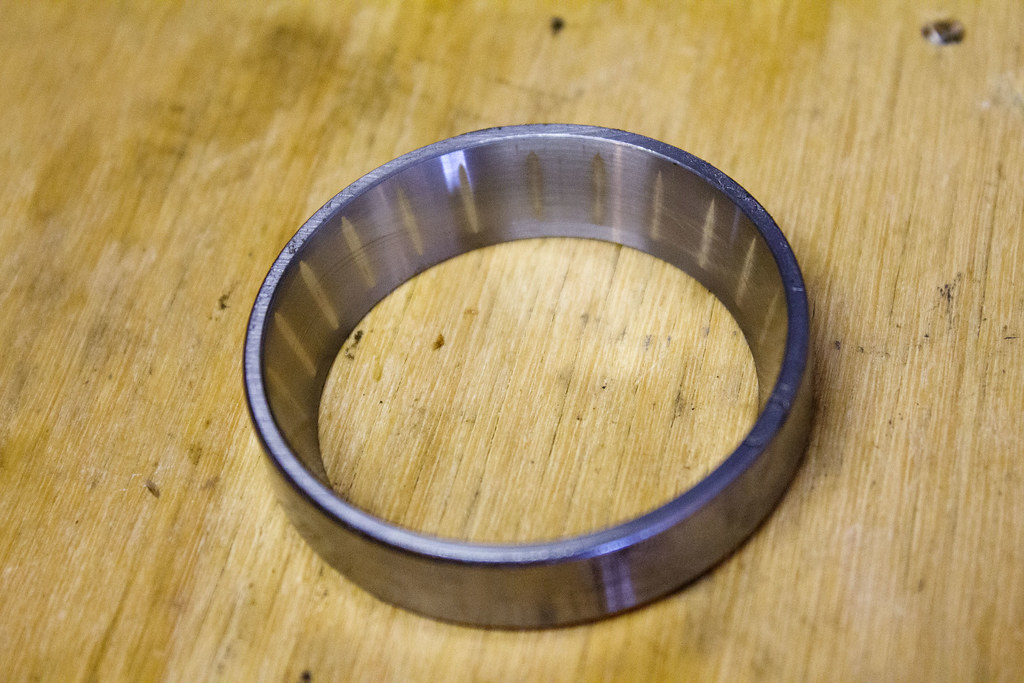
Hmm.. wonder how bad the top race is going to be? Surprisingly, it looked and felt in pretty good condition.. it will still get replaced though.
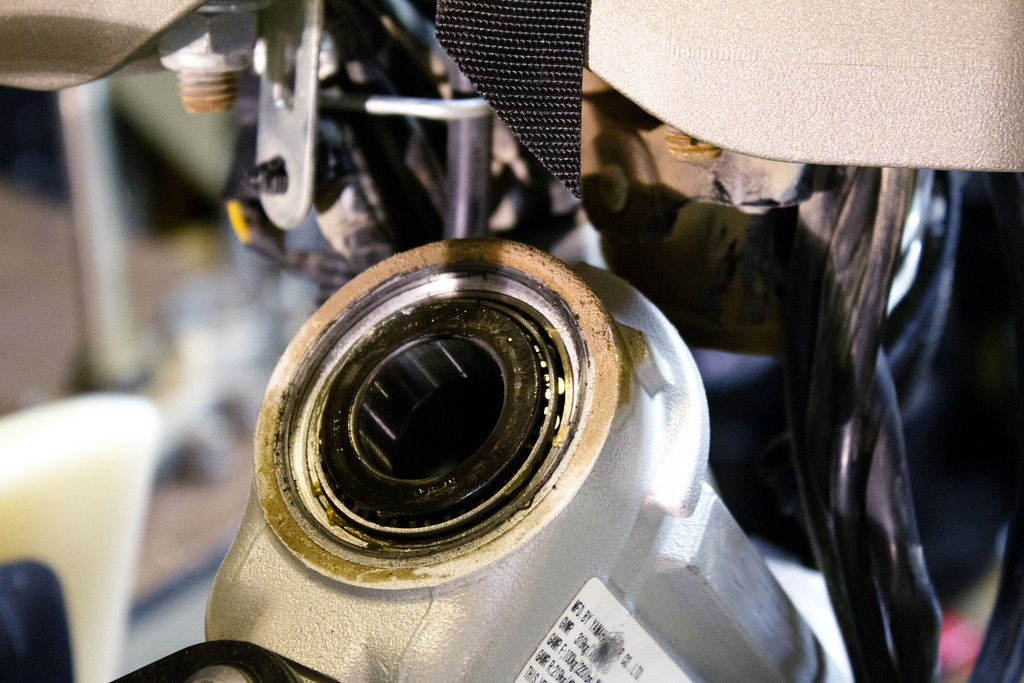
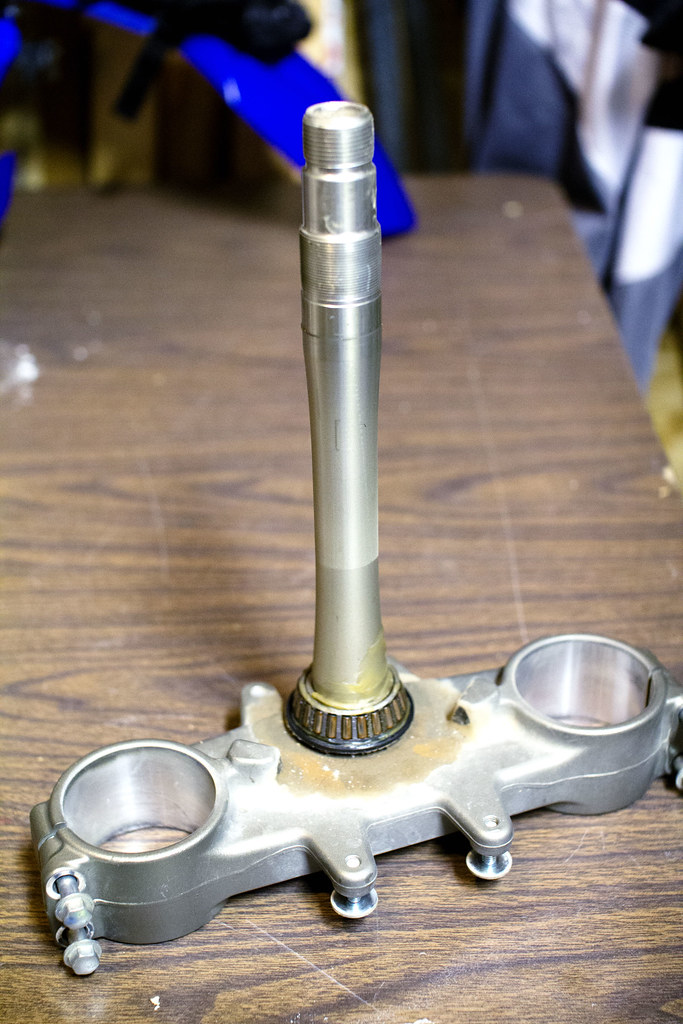
Now its time to look at the bottom bearing, how’s it holding up?!?
First thing I noticed was the moisture & dust collection around the lower seal… then the even more Mississippi dust color all over the bearings.

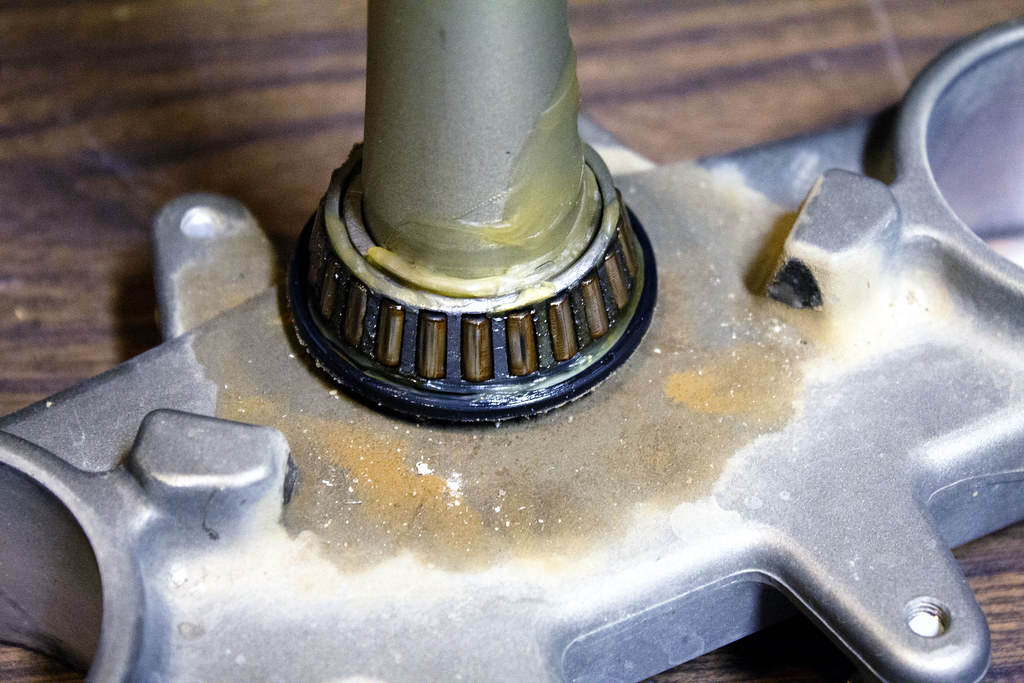
You can see the wear marks on each bearing.. so the bottom race must match the bearings condition… yep. sure does.
I could see pitting in the race, running my finger around it, it should be as smooth as glass.. and this one is NOT! I can feel and visibly see the pitting from the damage.
I’ve ordered replacement bearing kit from RockyMountain ATV/MC and should have it next week. So stay tuned for my next post on putting this all back together with new, well greased bearings!! Now, if you haven’t done so.. HEED THE WARNING.. and go grease up that steering!
No Comments