


08 Jul Baja Designs XL Pro // KTM 3-Fiddy
The 2017 KTM EXC-F’s come equipped with a standard headlight that is not very bright to say the least. Yes it get’s the job done, but when you get out on the trail at night it’s not much help.. been there… done that!
Stock Light w/ Sicass Turn Signals

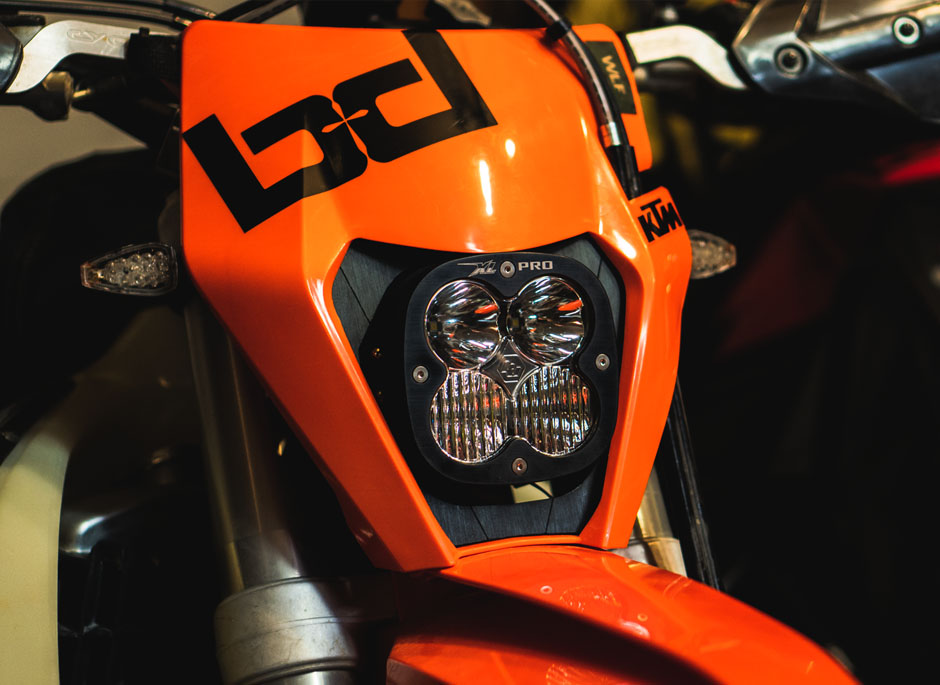
The better alternative is equipping your KTM with a Baja Designs LED headlight. Luckily for me I had a buddy that had just bought an XL Pro but then decided to start a project KTM 500 EXC-F bike and went with a brighter light than the XL Pro. Soooo.. I gladly took it off his hands!
Mounting
Before I get any further, you can buy the LED light only and throw it in your stock headlight mask and away you go. BUT.. you will soon find out you have no way to truly fine too the direction the light points, it’s pretty limited. Fortunately, Motominded has produced a mounting kit for Baja Designs lights. Or if you want, you can buy the Baja Designs LED and mount kit from Motominded in one order. It’s up to you.. I contacted Motominded and told them what bike I had and what Baja Designs LED I had and they gave me the exact mounting kit I needed. Grab a wiring harness too!
The parts I needed:
- Baja Designs XL Pro LED
- MotoMinded XL Bracket Change Over Kit – KTM 2017-18 up to 500cc BILLET
- Baja Designs XL KTM Hi-Low Wiring Harness
* Click images to enlarge
Remove Stock Headlight
Remove your stock headlight mask and unplug the headlight and turn signals, as well as any other electrical connectors. You’ll need to keep the main headlight connector to the side as you may need to test it with a multimeter to determine which wires are high or low beam.

Remove your stock headlight from the stock mask with a T20 torx.

Wiring Harness
The wiring harness will connect to the LED connector and the stock light connector from the bike.

Using the red provided connector, place the crimped pins in the connector in the correct slot for your bike to connect the correct colored wires.

On the 2017 KTM 350 EXC-F here’s the wire match:
STOCK
Brown – Ground
Blue – High beam
Green – Low beam
HARNESS
Black – Ground
White – High beam
Yellow – Low beam
When pushing the crimped pins in the connector, make sure you hear a “CLICK” when pushing them in. This means they’re seated correctly and won’t come out.

MOTOMINDED BRACKET KIT
The Motominded bracket mounts the LED to the mask plate and allows for adjustment of the LED up or down. Remove the locking wings from the mask plate.
Attach the Motominded bezel to the LED with four allen screws. This will hold the LED lens cover on.

Attach the Motominded bezel to the LED with four allen screws. This will hold the LED lens cover on. Now it’s time to mount the locking wings onto the LED.

The locking wings fit into the two slots that wrap around the LED. Using a 2mm allen and 7/32 socket, tighten the wing nuts just enough so the washers are touching the wing. It’s not time to tighten these up complete. This helps with getting the locking washers between the light and locking wings….

The lock washer will go between the mask and light as seen in the photo.
The easiest way for me was to, first, get one lock washer and bolt started on one side..

On the other side use two flathead screw drivers, one to lift the mask slightly away from the light as you use another flathead to push the washer in. This method worked very easy, no fighting the lock washer!

Once both lock washers and bolts are on, you can tighten the locking wing nuts and snug up the side bolts just enough were the light will stay in place on the trail but you can also tilt the LED up or down as needed.

Use small zip-ties to tidy up the light wire as shown, Motominded has pre-drilled small holes for these ties. This works very well! It’s like they are moto-minded or something!!

MOUNT LED TO MASK
Take the LED and mount and install it onto the mask from behind. You’ll have two allens at the top and one screw at the bottom. You can use either whole at the bottom, which ever one fits better.

Kinda eyeball the direction the LED should be tilted and install the light assembly back onto the bike, connecting the new wiring harness to the stock light connector.

NOTE:
With this wiring harness when you turn the headlight on low beam the high beam indicator will be on. Baja Design’s notes this in their instructions.. if someone knows a hack to fix this, please comment below!! If you have any questions just send me a note.
Both the Baja Designs LED XL PRO and Motominded Bracket Change Over Kits are very well made and high quality products.
Hope this helps someone installing this kit, Motominded instructions are pretty clear… now it’s just time to go ride!


Brittny
Posted at 20:09h, 16 SeptemberThank you for this guide, I’ve been racking my brain on how to install this for a while. Lets say I’m not very mechanically intuitive. lol